What is Next.js and Next Js Deployment on cPanel ?
Next.js is a popular React framework used for building server-side rendered (SSR) and statically generated (SSG) web applications. It is built on top of React and provides additional features and optimizations for building scalable and high-performance applications. In this tutorial we will learn Next.js Deployment on cPanel Shared Hosting.
Next.js simplifies the process of building complex web applications by providing features like server-side rendering, automatic code splitting, static site generation, and client-side routing. It allows developers to write modern JavaScript, including React components, and seamlessly renders them on the server, providing fast initial page loads and improved search engine optimization (SEO).
With Next.js, you can create dynamic and interactive web pages that load quickly, enhance the user experience, and are easily scalable. It also provides built-in support for CSS modules, API routes, and various deployment options.
Next.js has gained popularity due to its developer-friendly features, performance optimizations, and its ability to handle both server-side rendering and static generation, making it a versatile framework for building modern web applications.
Here are a few challenges to deploying Next.js projects on cPanel shared hosting.
- Shared hosting resources are limited. Shared hosting plans typically offer limited CPU, memory, and storage resources. This can be a challenge for Next.js projects, which can be resource-intensive.
- Shared hosting environments are not always optimized for Next.js. Shared hosting providers often use outdated versions of Node.js and other software that may not be compatible with Next.js. This can lead to performance problems and other issues.
- Shared hosting providers do not offer the same level of support as dedicated hosting providers. If you encounter problems deploying or running your Next.js project on shared hosting, you may have difficulty getting help from the hosting provider.
If you are considering deploying a Next.js project on shared hosting, it is important to weigh the risks and benefits carefully. If you have a small project with low traffic, shared hosting may be a viable option. However, if you have a larger project or expect high traffic, you may be better off with a dedicated hosting plan.
But you want to deploy a Next.js app in shared hosting, take no worries. In this tutorial, we will walk you through the process of deploying a Next.js application on cPanel shared hosting. Although cPanel is primarily designed for hosting static websites, with a few modifications and tricks, we can successfully deploy a Next.js app on it. So let’s get started!
Step 1: Prepare your Next.js project
Make sure your Next.js project is ready for deployment. Ensure that it builds without errors and that all dependencies are correctly specified in the package.json file. If you haven’t built your application yet, follow these steps:
- Install Node.js and npm on your local machine if you haven’t already.
- Open your terminal or command prompt and navigate to your project directory.
- Run the command:
npm run build - This will generate a production-ready build of your Next.js app in the “out” directory.
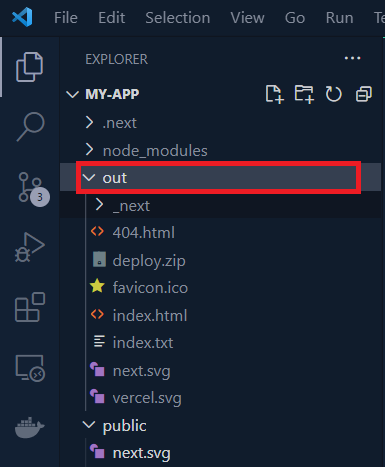
The out folder is essentially a super-compressed version of your program that has everything your browser needs to identify and run your app.
Go to your “out” folder. Select all of your file and compress them into a zip file.
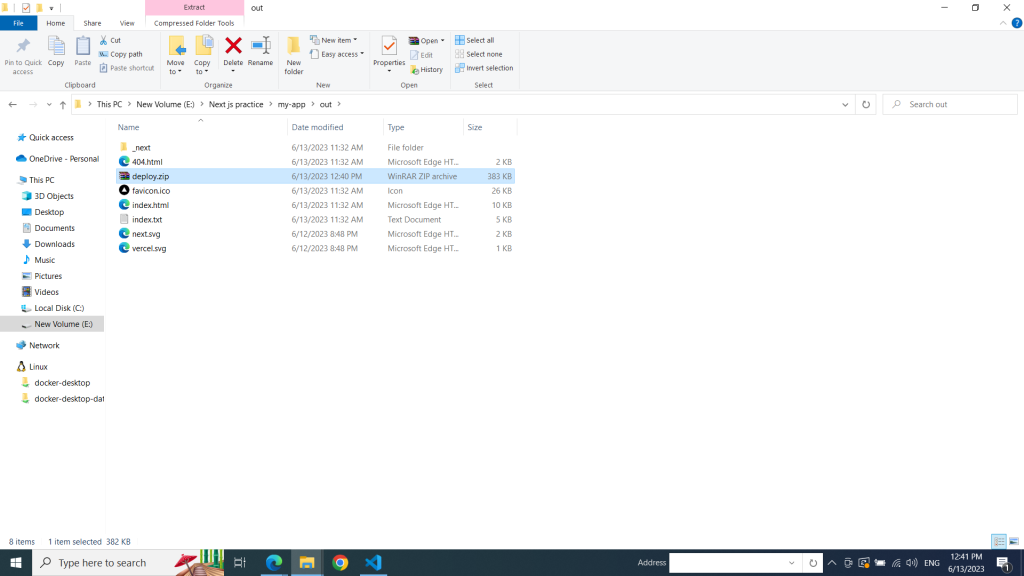
Step 2: Prepare Your cPanel Account
To deploy your Next.js app on cPanel, you need to perform the following preparations:
- Access your cPanel account.
- Set up a new subdomain or use an existing one for your Next.js app. For example, “next.yourdomain.com”.
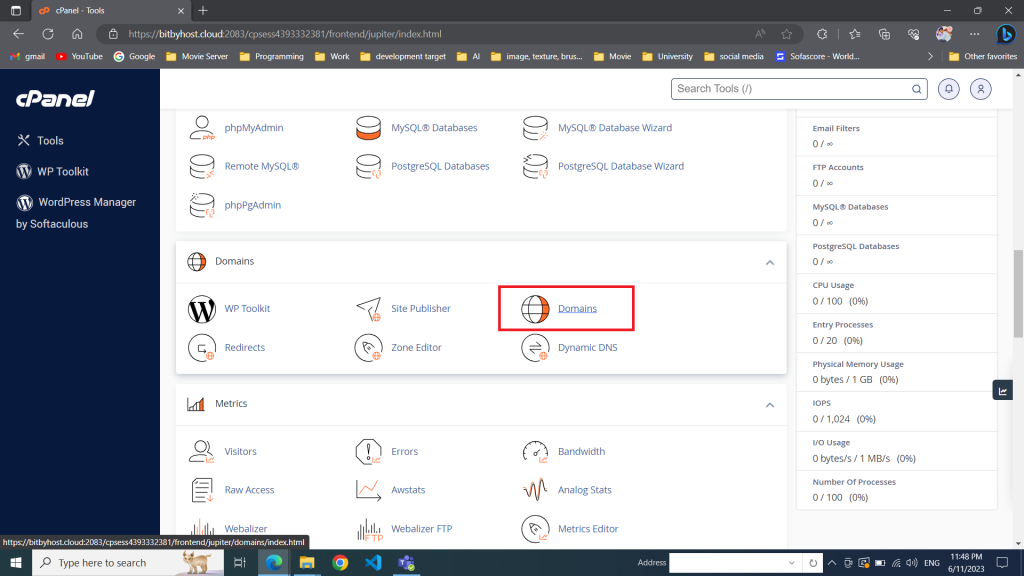
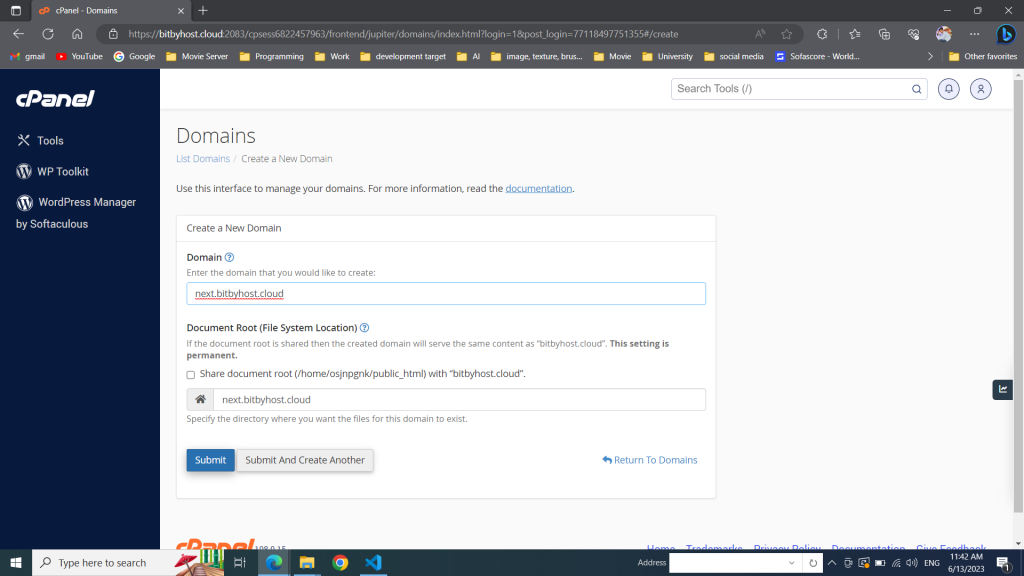
To create a subdomain. Go to your cPanel account. Find domains section Click “Domains” under the “Domains” section.
Click the “Create A New Domain” button.
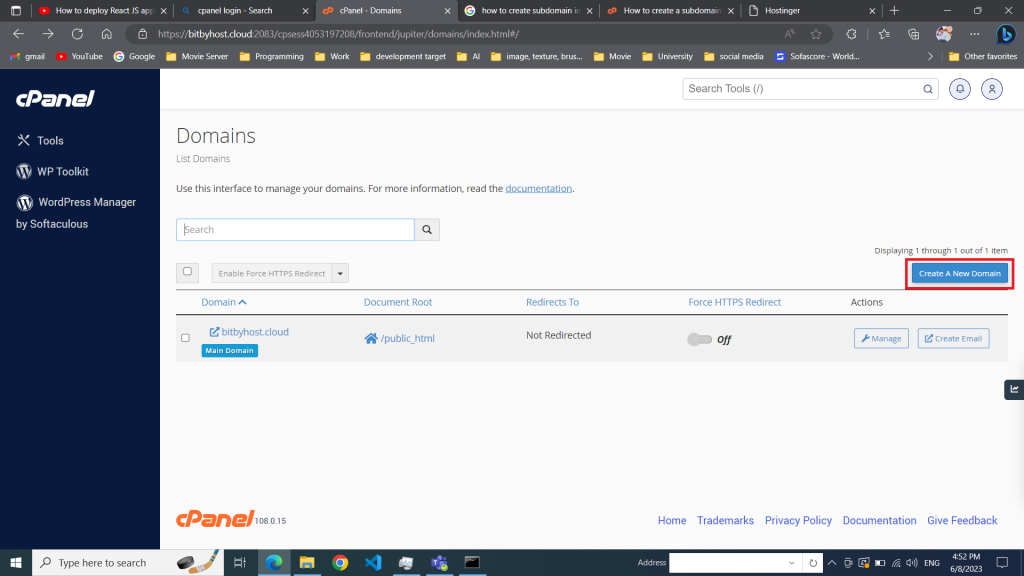
Enter the subdomain name to add in the “Domain” text box.
Deselect the “Share document root (/home/username/public_html) with “domain.tld”.” option.
Enter the directory where you want the files for this subdomain to exist.
Click the “Submit” button.
Step 3: Upload Your Next.js App to cPanel
Now, let’s upload your Next.js app to cPanel
After submit the subdomain name you will see your newly created subdomain in domain list.
now click on document root to navigate root folder
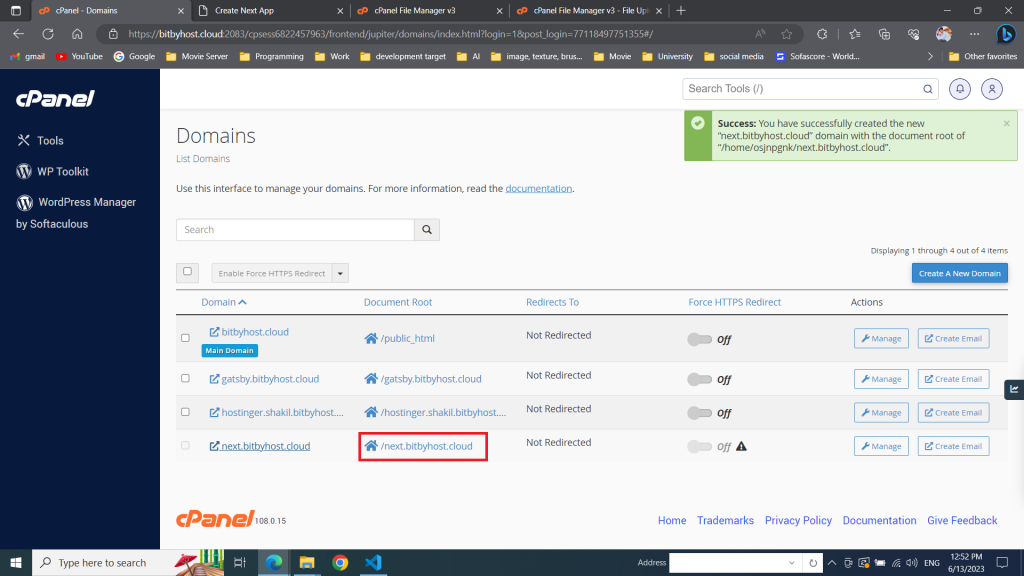
it will redirects you to a new tab with cPanel file manager where you will see your subdomain root folder and click on it. After clicking the folder the folder should be empty.
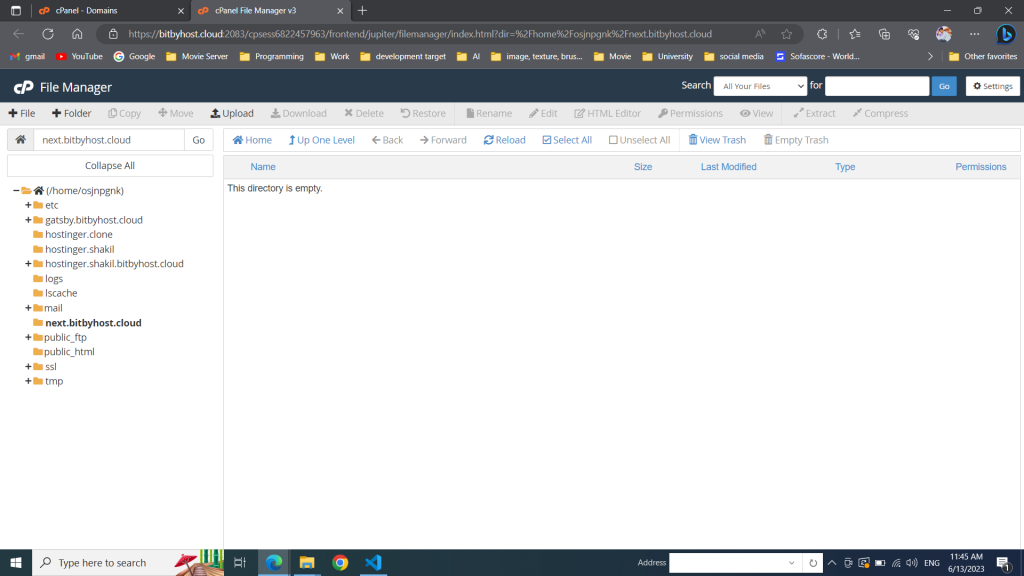
on top bar you will see a upload button. click on it and it will redirect you to a new tab where you can upload your next.js file.
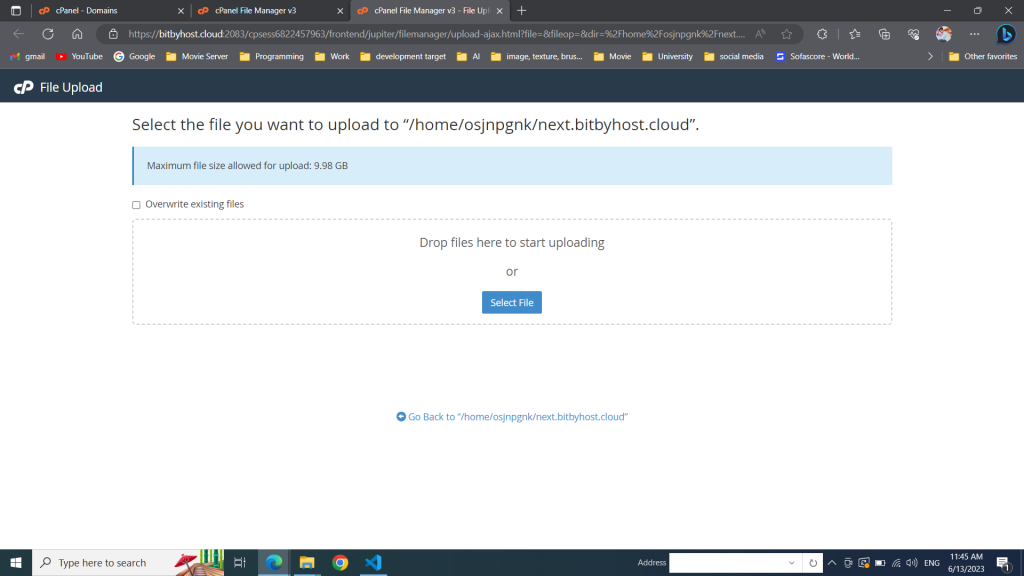
Upload your zip file from out folder what you have created little earlier.
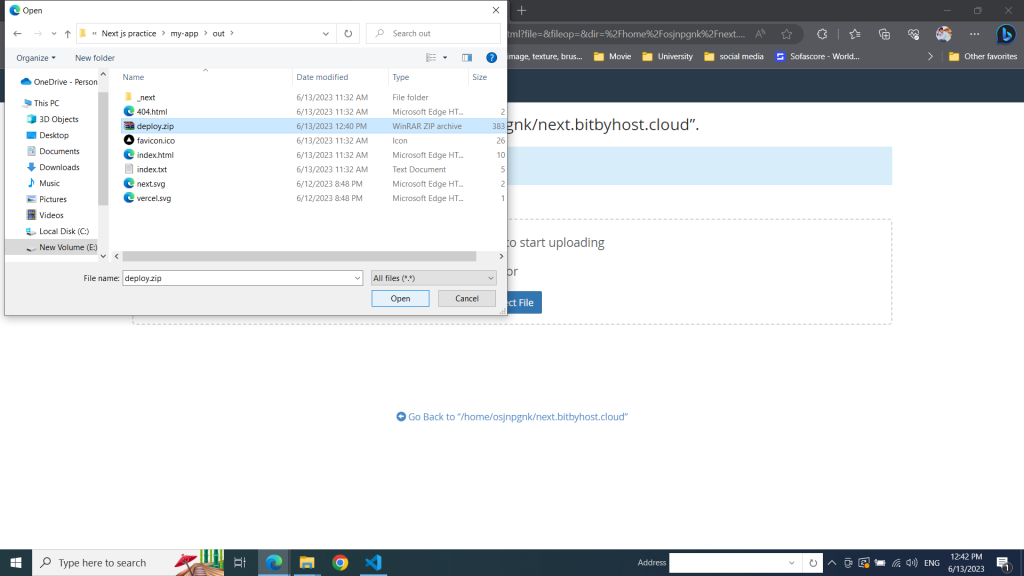
After uploading 100% go to cPanel file manager tab and click on refresh button.
You will see uploaded zip file there and extract the file
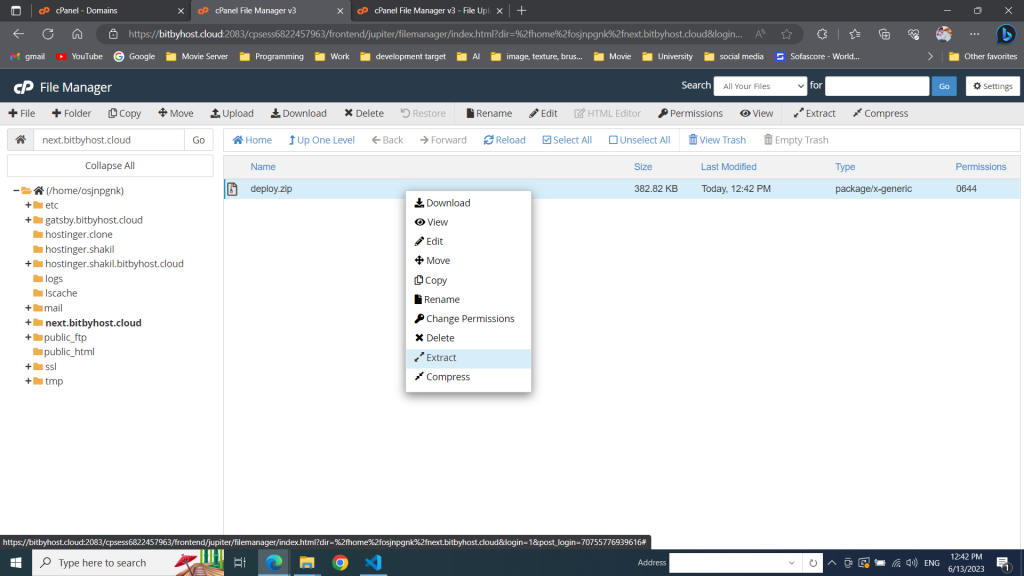
Now you’ll see extracted folder file here.
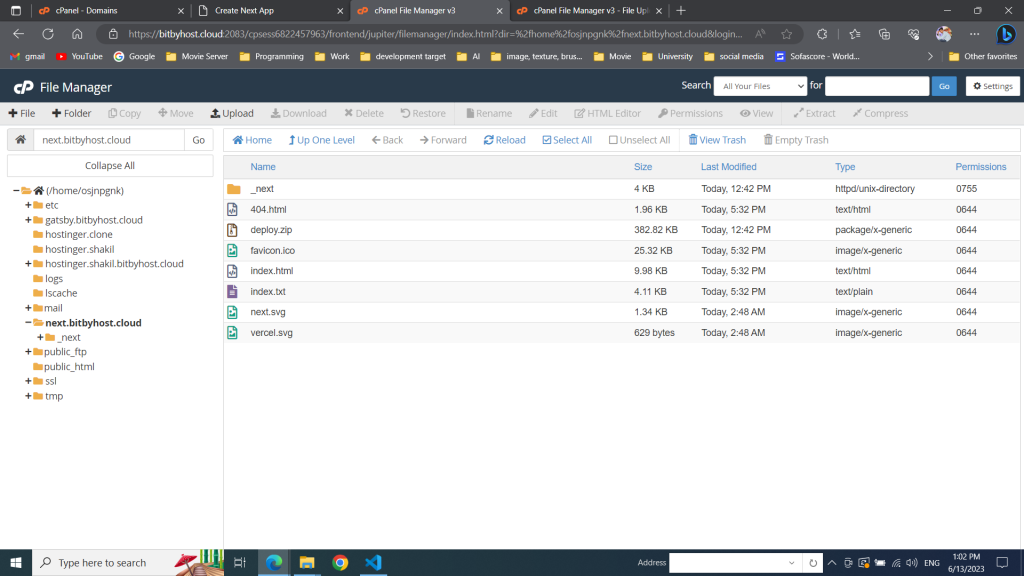
Once the upload is complete, ensure that the subdomain folder contains the “index.html” file and other assets.
Step 4: Access Your Deployed Next.js App
Congratulations! Your Next.js app is now deployed on cPanel shared hosting. To access it, simply open your web browser and visit your subdomain URL (e.g., next.yourdomain.com). You should see your Next app running smoothly.
Conclusion:
In this tutorial, we learned how to deploy a Next.js app on cPanel shared hosting by creating a production build, uploading the files updating the “index.html” file. While cPanel is primarily designed for static websites, with a few modifications, you can successfully host a Next.js app. Now you can showcase your amazing Next projects to the world using the convenience of shared hosting. Happy coding!


